1. What is Bean Validation
Bean Validation이란 무엇인가?
다음에 대한 설명을 해당 사이트에서 찾아왔다.
Jakarta Bean Validation is a Java specification which
- lets you express constraints on object models via annotations
- lets you write custom constraints in an extensible way
- provides the APIs to validate objects and object graphs
- provides the APIs to validate parameters and return values of methods and constructors
- reports the set of violations (localized)
- runs on Java SE and is integrated in Jakarta EE 9 and 10
출처 : https://beanvalidation.org/
annotaion을 통한 확장가능한 custom제약과 parameter 검증을 제공한다.
굉장히 친숙한 친구( 친구야 살살하자... )이기도 하고 사용하는데 크게 어려움이 없다.

정확한 내용을 알고 싶으면 document를 읽는게 좋지만... 너무 길은걸... ㅠㅠ
근데 javax.validation와 org.hibernate.validator가 있는데 javax.validation은 특정 구현에 관계없이 제공되는 표준 인터페이스고, org.hibernate.validator는 hibernate validator 구현체를 사용할 때만 제공되는 검증 기능이다.
뭘 써도 딱히 상관은 없단다
2. 사용해보기 - Field Error 처리
이것을 사용하려면 dependency에 다음을 추가하면 된다.
implementation 'org.springframework.boot:spring-boot-starter-validation'
차암 쉽죠?
그러면 어떻게 사용하는가?
package hello.itemservice.domain.item;

import lombok.Data;
import org.hibernate.validator.constraints.Range;

import javax.validation.constraints.Max;
import javax.validation.constraints.NotBlank;
import javax.validation.constraints.NotNull;

@Data
public class Item {

    @NotNull(groups = UpdateCheck.class)
    private Long id;

    private String itemName;

    @Range(min = 1000, max = 1000000)
    @NotNull
    private Integer price;

	@NotBlank
    private Integer quantity;

    public Item() {
    }

    public Item(String itemName, Integer price, Integer quantity) {
        this.itemName = itemName;
        this.price = price;
        this.quantity = quantity;
    }
}
이런 식으로 입력 받아야 하는 성분 위에 선언을 해주면 된다.
validation을 해놓은 성분의 조건에 충족되지 않는 입력값이 들어올 경우
MessageConverter에서 자체적으로 메시지 코드를 다음과 같이 만들어준다.
예를 들어서 quantity로 하겠다. 현재 @NotBlank로 되어있는데 이 부분에서 오류가 생기면 다음과 같은 메시지 코드를 만들어준다.
quantity와 @NotBlank
- NotBlank.item.quantity
- NotBlank.quantity
- NotBlank.java.lang.String
- NotBlank
같은 방식으로 price로 한번 하겠다.
price와 @NotNull
- NotNull.item.price
- NotNull.price
- NotNull.java.lang.inteter
- NotNull
@NotNull, @NotEmpty, @NotBlank 세 개는 비슷한데
나도 헷갈려서 찾는중 잘 정리해 놓으신 분이 있어서 긁어왔다.
참고 : https://sanghye.tistory.com/36
그런데 Field Error 말고 Object Error의 경우에는 어떻게 해야 할까?
3. 사용해보기 - Object Error 처리
ObjectError 처리를 위해 지원해주는 기능중 @ScriptAssert가 있다.
근데 이거는 제약이 많다고 하니 안쓰는걸 권장한다고 한다.
많은 상황에 대해 대처가 안된다고 한다! (아예 안쓴다는말).
ckage hello.itemservice.domain.item;

import lombok.Data;
import org.hibernate.validator.constraints.Range;
import org.hibernate.validator.constraints.ScriptAssert;

import javax.validation.constraints.Max;
import javax.validation.constraints.NotBlank;
import javax.validation.constraints.NotNull;

@Data
@ScriptAssert(lang = "javascript", script = "_this.price * _this.quantity >= 10000")
public class Item {

    @NotNull(groups = UpdateCheck.class)
    private Long id;

    private String itemName;

    @NotNull
    private Integer price;

    @NotBlank
    private Integer quantity;

    public Item() {
    }

    public Item(String itemName, Integer price, Integer quantity) {
        this.itemName = itemName;
        this.price = price;
        this.quantity = quantity;
    }
}
차라리 직접 오브젝트 오류 관련 부분만 직접 자바 코드로 작성하는 것을 권장한다고 한다.(무조건 이렇게 하라는 말)
그래서 total 가격에 대해서 무언가 validation을 처리하고 싶다면 코드로 구현하라고 한다.
    @PostMapping("/add")
    public String addItemV1(@Validated @ModelAttribute Item item, BindingResult bindingResult, RedirectAttributes redirectAttributes, Model model) {

        //특정 필드가 아닌 복합 룰 검증
        if (item.getPrice() != null && item.getQuantity() != null){
            int resultPrice = item.getPrice() * item.getQuantity();
            if (resultPrice < 10000){
                bindingResult.reject("totalPriceMin", new Object[]{10000, resultPrice}, null);
            }
        }

        //검증에 실패하면 다시 입력 폼으로
        if (bindingResult.hasErrors()){
            log.info("bindingResult = {}", bindingResult);
            return "validation/v3/addForm";
        }

        //성공 로직
        Item savedItem = itemRepository.save(item);
        redirectAttributes.addAttribute("itemId", savedItem.getId());
        redirectAttributes.addAttribute("status", true);
        return "redirect:/validation/v3/items/{itemId}";
    }
이런식으로 말이다.
이것의 한 객체에만 validation이 걸려있는데 등록과 수정을 한번에 사용할 경우 발생한다.
예를 들어, 등록과 수정 시 정책이 다르다면 현재 방법으로는 해결이 불가능하다.
그래서 group으로 묶어서 이를 해결할 수 있다.
4. Group 으로 validation 조건 처리
우선 원하는 기능을 구분해 줄 인터페이스를 생성한다.
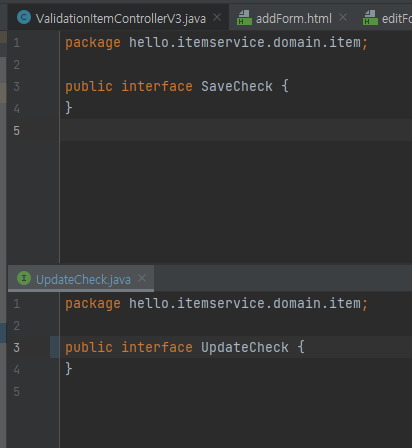
뭐... 특별한 것은 없고 빈 껍데기다
그리고 우리가 validation을 어느 상황에서 걸고 싶은지에 대한 설정을 다음처럼 하면 된다.
Item.java
package hello.itemservice.domain.item;

import lombok.Data;
import org.hibernate.validator.constraints.Range;

import javax.validation.constraints.Max;
import javax.validation.constraints.NotBlank;
import javax.validation.constraints.NotNull;

@Data
public class Item {

    @NotNull(groups = UpdateCheck.class)
    private Long id;

    @NotBlank(groups = {SaveCheck.class, UpdateCheck.class})
    private String itemName;

    @NotNull(groups = {SaveCheck.class, UpdateCheck.class})
    @Range(min = 1000, max = 1000000, groups = {SaveCheck.class, UpdateCheck.class})
    @NotNull
    private Integer price;

    @NotNull(groups = {SaveCheck.class, UpdateCheck.class})
    @Max(value = 9999, groups = {SaveCheck.class}) //수정 요구사항 추가
    @NotBlank
    private Integer quantity;

    public Item() {
    }

    public Item(String itemName, Integer price, Integer quantity) {
        this.itemName = itemName;
        this.price = price;
        this.quantity = quantity;
    }
}
group으로 어느것들의 경우 validation을 걸어줄 것인지 확인하고...
사용하는 곳에서는 @Validated 뒤에 group명을 적어주면 된다.
@PostMapping("/add")
public String addItemV2(@Validated(SaveCheck.class) @ModelAttribute Item item, BindingResult bindingResult, RedirectAttributes redirectAttributes) {

    //특정 필드가 아닌 복합 룰 검증
    if (item.getPrice() != null && item.getQuantity() != null){
        int resultPrice = item.getPrice() * item.getQuantity();
        if (resultPrice < 10000){
            bindingResult.reject("totalPriceMin", new Object[]{10000, resultPrice}, null);
        }
    }

    //검증에 실패하면 다시 입력 폼으로
    if (bindingResult.hasErrors()){
        log.info("bindingResult = {}", bindingResult);
        return "validation/v3/addForm";
    }

    //성공 로직
    Item savedItem = itemRepository.save(item);
    redirectAttributes.addAttribute("itemId", savedItem.getId());
    redirectAttributes.addAttribute("status", true);
    return "redirect:/validation/v3/items/{itemId}";
}
그런데 이것의 한계는 한눈으로 보기에도 복잡하고
일반적으로 수정 폼과 등록 폼은 따로 만든다. 즉, 수정용 객체와 등록용 객체를 따로 만들기 때문에 굳이 이렇게 할 일이 없다는 말이다.
5. 전 직장에서의 추억
별로 상관 없는 내용일수도 있으나 validation을 보니 전 직장에서의 일이 생각난다.
사실 필자는 전 직장에서 다른 프레임워크를 사용했는데 도대체 왜 validation을 적용하지 않았는지 이해가 안됐다.
java 기반이라면서 왜 도대체...
비즈니스 로직에서 전부 null인지 확인하고 해당 조건을 부여하는 원시적인 방법으로 작업을 했다.
그때 당시에는 시키는 것을 하기에 급급한 사람이었지만 지금 생각해보면 참.... 개판이었다.
그도 그럴것이 이렇게 entity성 객체를 생성해서 무언가를 하지도 않고 무조건 Key - Map형식으로 받아오게끔 되어 있었기에 이것들을 작업하기에 굉장히 불편했을거라 생각한다. 아예 적용이 안되는 구조인것이지...
그러면 그 프레임워크에서 무슨 기능을 지원하는지 알아야 하는데 document 나 생태계는 거의 빈사상태... 메머드와 같은 운명을 하기 직전이었다...
웃긴것은 그 프레임워크용 강의가 있는데 왜 그걸 직원들에게 보라고 주질 않는지...? (그렇게 주먹구구로 하면 속이 꼭 후련했냐...?ㅠㅠ )
이러한 자잘한 여러가지 도구의 부재가 결국 프로젝트의 성능, 기술력 그리고 최종적으로는 더 나은 것을 생각할 시간의 부재로 이어졌다고 생각한다.
그래서 평소 spring 기초에 대해 내가 집요하게 공부하는 이유가 바로 그것이다.
어떤것을 사용함에 있어서 좋은 기능을 최대한 활용해서 개발 효율성을 극대화하고 싶은데 그러한 기능의 부재는 결국
시간 소비로 이어지고, 모두가 검증 로직을 개개인의 방식대로 작성을 하니 매일 야근을 할 수 밖에...
Spring의 위대함과 퇴사를 한 나의 선택이 너~무 대견하다는 생각에 상관없는 말을 끄적여보았다.
고로, spring...너무 좋은 기능이 많아서 행복하다옹....
'Spring > 스프링 기본' 카테고리의 다른 글
| ProxyFactory란? (0) | 2022.03.27 |
|---|---|
| 오류 처리 / API 예외 처리 (0) | 2022.03.20 |
| 오류 처리 / validation & bindingResult (0) | 2022.03.18 |
| Filter vs HandlerInterceptor - 간단 logging 기능 구현 (0) | 2022.02.28 |
| Filters vs HandlerInterceptors - 개념 (0) | 2022.02.28 |